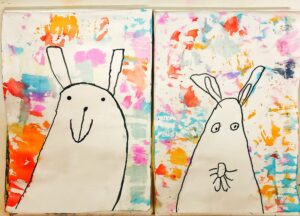
Our cute little Easter Bunnies are ready to pop some colors around this Easter, with bleeding tissue paper art!
We got a perfect chance to explore the bleeding tissue paper art technique this weekend.
It’s really fun and easy.
All you need-
- some heavy paper that can take getting wet
- colored paper that will bleed (paper buntings work really well), and
- a spray bottle of water
We used material available in our #kidoSmartKit activity box and thus had all these things handy. If you don’t have a spray bottle, you can use a wet sponge to dab on the colored paper as well.
The steps are-
- The first step is to draw a picture or image of your choice on the sheet (we made Easter Bunny) and then apply 2-3 coats of water using a brush on the space around the image.
- Now, tear the colored bunting into smallish pieces and arrange them on the wet parts of the sheet.

- Next, spray the project with water. This was the most awaited and exciting part for kids.
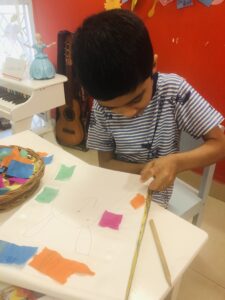
Make sure that all of the colored paper pieces are wet and touching the paper (the color will only transfer where the colored bits of the paper touch the paper).
- The last step requires patience – Let dry.
As the paper bits dry, the color will bleed onto the paper below. Anywhere that the colors overlap will give a blend of color that is sort of magical to watch.
After the project is dry, it is time to remove the colored paper pieces. Remember, If you remove them too soon, the effect might not come clearly. So be patient and give it some time to dry properly.
Once done, outline the image (optional) and we are ready!
Hope you try this out and enjoy some colorful moments with the little one!
Happy Easter!
Go Mommy!